


Hello world!
Have you heard about Notion? Do you use Notion?
Notion is a super-clean and deceptively minimalist note-taking app. I am still learning how to use Notion because I have recently started using it, and If you are a regular reader you must know by now, I am big Python fan. So I was exploring how to use Notion a week earlier and it it hit me, is there a way I can automate it with Python. So in this Blog article, we will learn how to Automate Notion. We will see the implementation in Python.
Check out the Repository for Ultimate Resource in python. Drop a star if you find it useful! Got anything to add? Open a PR on the same!
You can refer to my YouTube video Tutorial to see a working tutorial for better Understanding and a step by step Guide of the same.
What will be covered in this Blog
1. What is Notion?
2. Modules Used
2. How to Automate Notion Using Python
Let's get started!
What is Notion?:
The Dictionary Definition:
Notion is an application that provides components such as databases, kanban boards, wikis, calendars and reminders. Users can connect these components to create their own systems for knowledge management, note taking, data management, project management, among others.
A new tool that blends your everyday work apps into one. It's the all-in-one workspace for you and your team. If you wish to know more about it, you can refer to:
Module Used:
Notion Module:
Notion module is Unofficial Python API client for Notion.so. It also works for both free and as well as paid accounts.
Let's look at some of its Features:
- It has Object-oriented interface (mapping database tables to Python classes/attributes)
- Automatic conversion between internal Notion formats and appropriate Python objects.
- Callback system for responding to changes in Notion(e.g. for triggering actions, updating another API, etc)
- Local cache of data in a unified data store (Note: disk cache now disabled by default; to enable, add
enable_caching=Truewhen initializingNotionClient)
If you wish to know more about it, you can refer to Notion Module Documentation.
Now that you are familiar with Notion use cases and have acquired basic knowledge of Notion module we can move forward to the coding section.
Time to Code!
You can find all the code at my GitHub Repository. Drop a star if you find it useful.

In order to access the Python library, you need to install it into your Python environment, use the following command to install Notion
pip install notion
I will make use of Habit Tracker template. We will prepare a script that will add a new row at the end with proper formatted date.
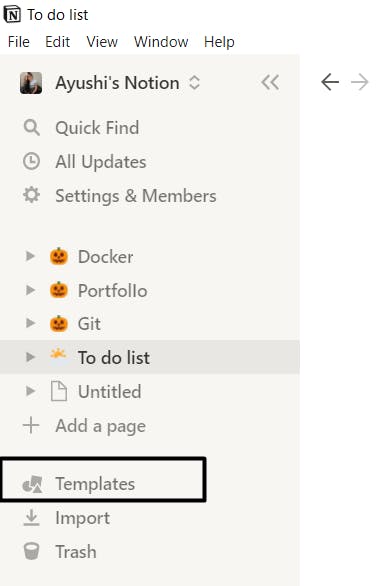
Once you open Notion, you can spot Templates in the Navigation left Side bar.
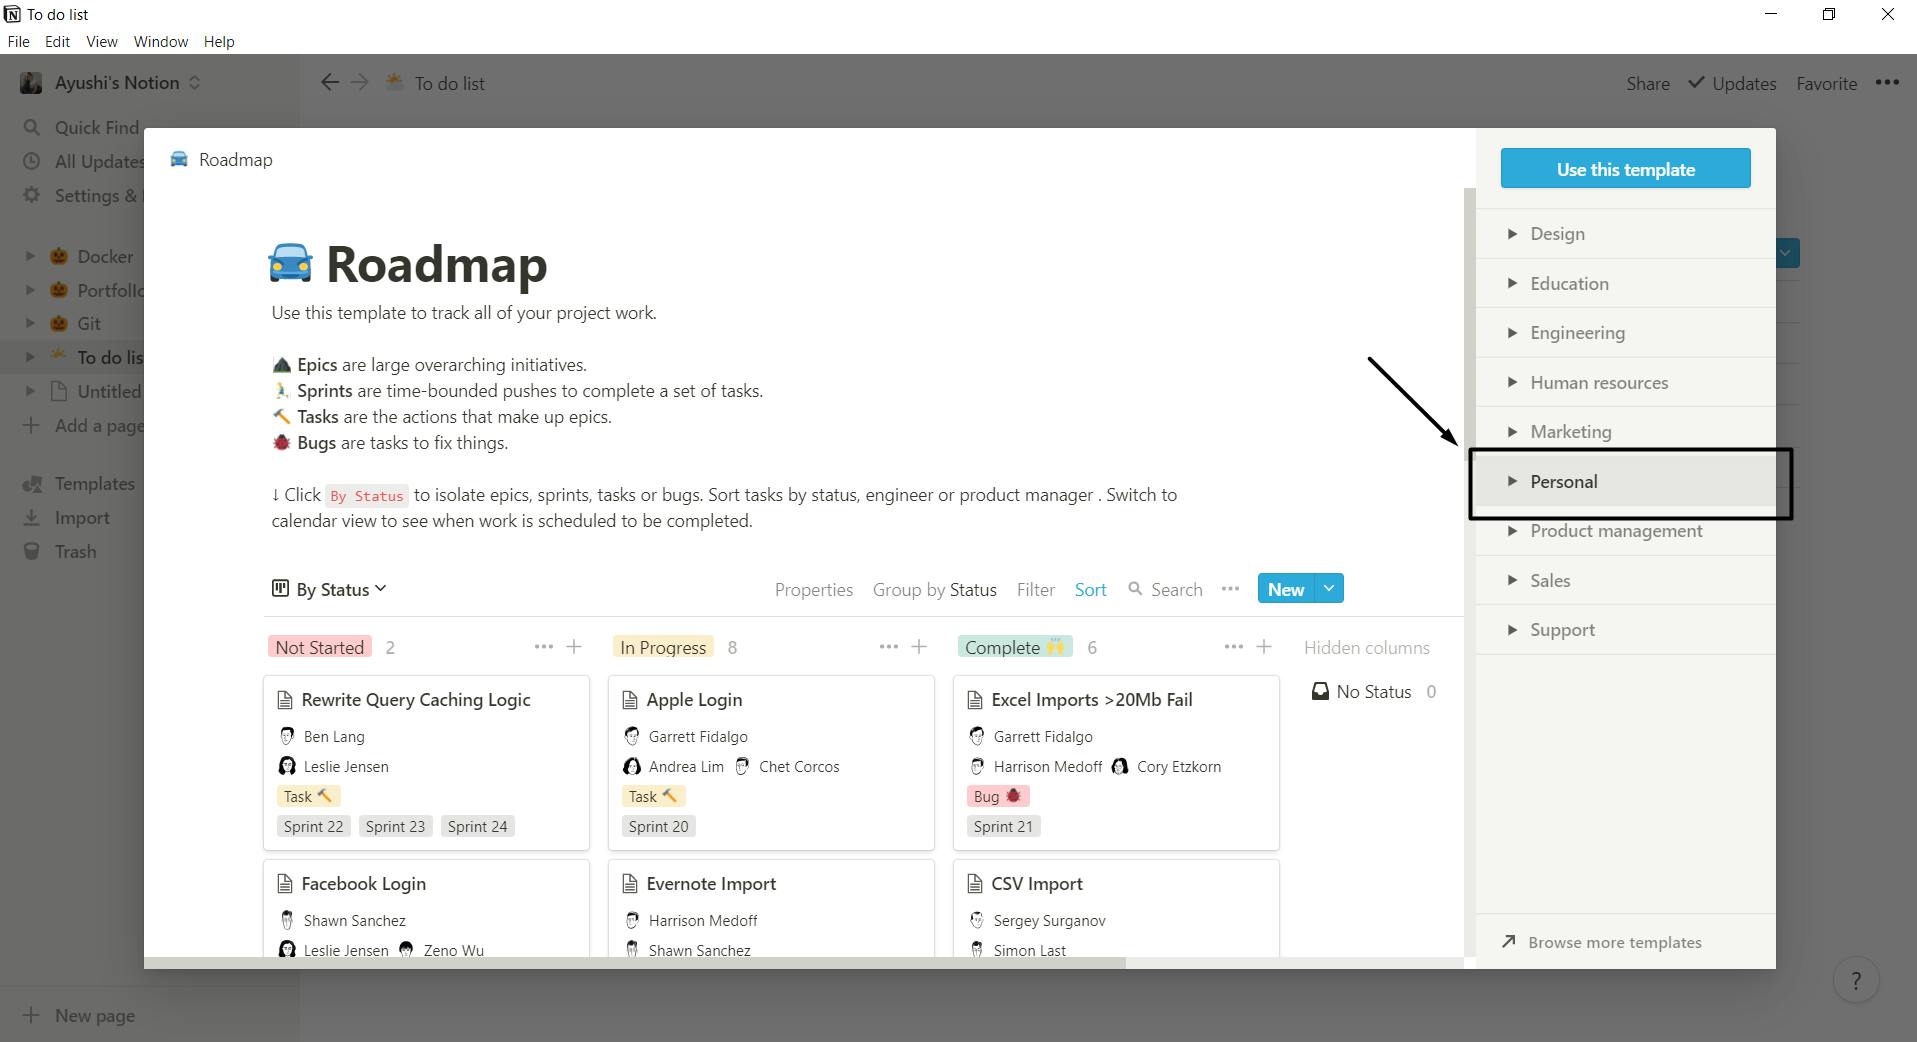
If you open it, a new pop window will open, expand the Personal Tab.
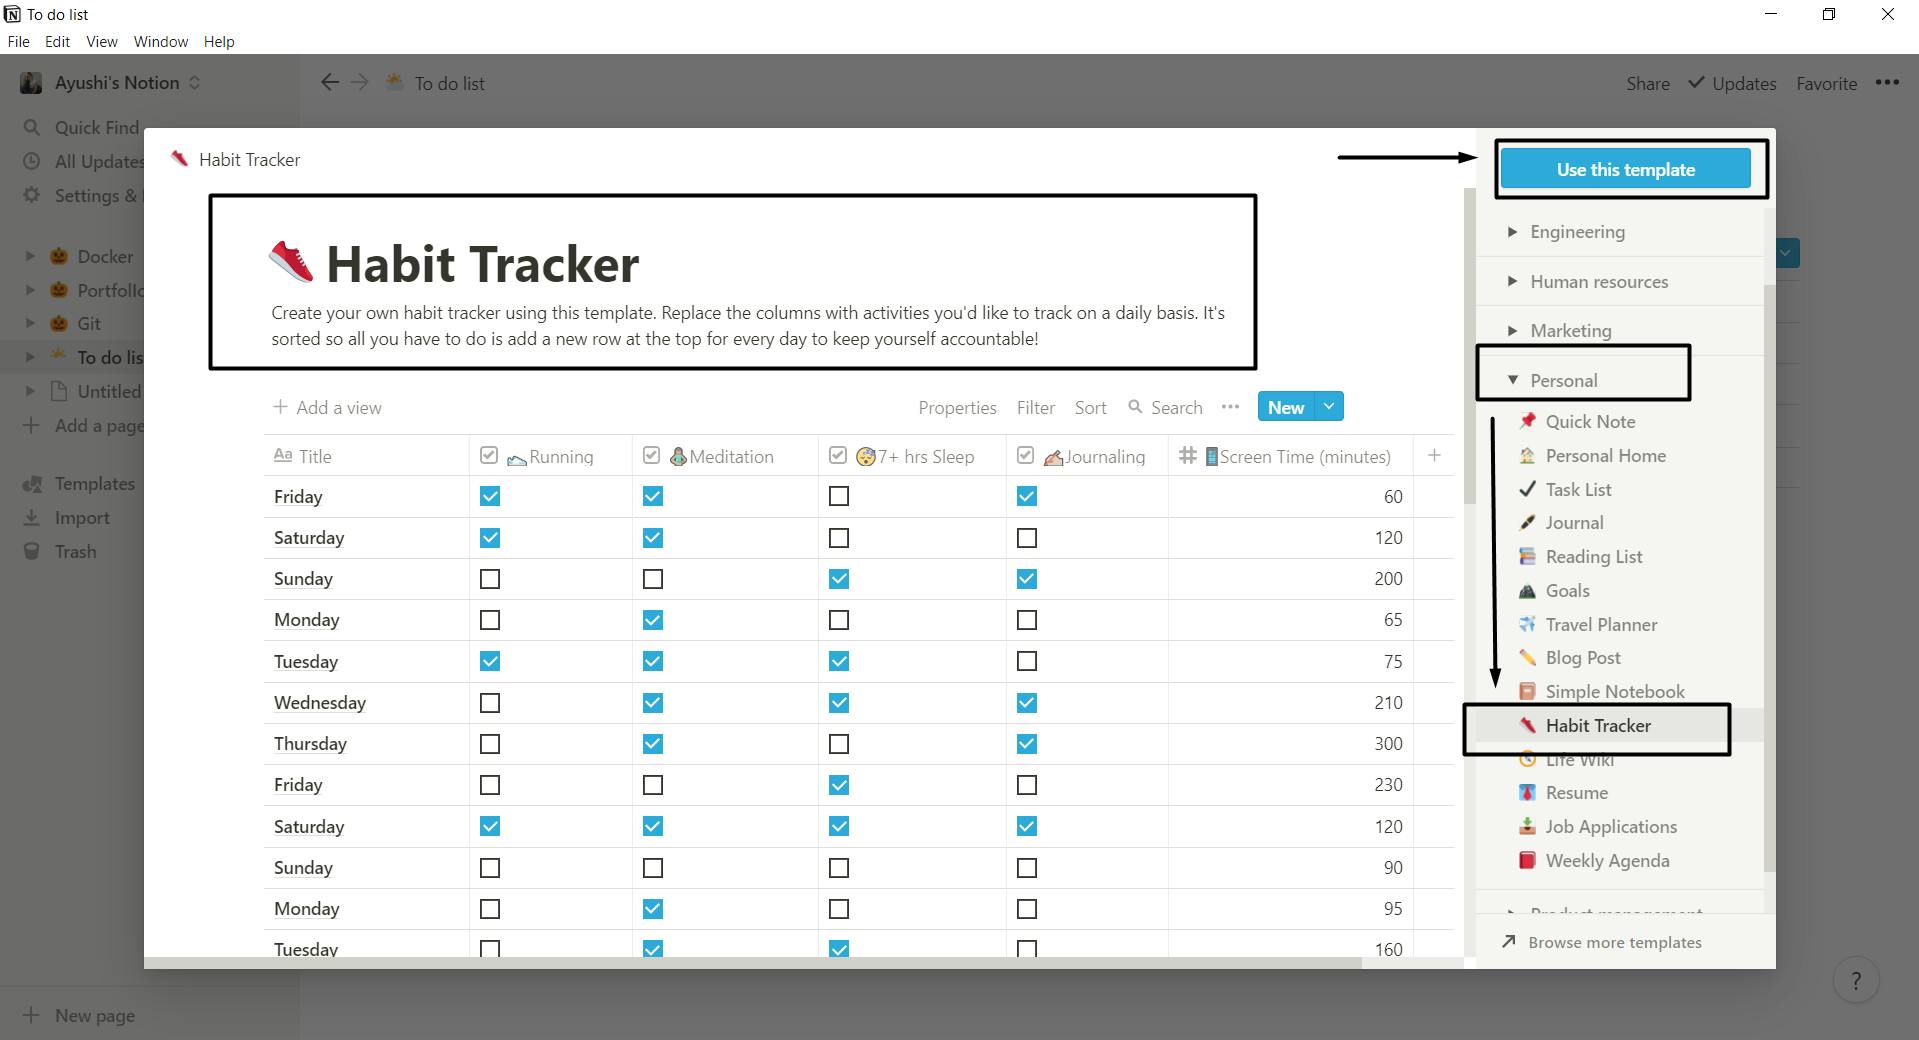
Once you expand the Personal Tab, you will be able to spot the Habit Tracker Template. Post successful selection, hit Use this template.

If the template appears in your Left Navigation bar, you have successful imported it in your Notion.
Now, we need to import the package in out python script. Use the following command to do so.
from notion.client import NotionClient
Next, we require the authentication token. For this, open Notion in your browser. Post successful login, open DevTools.
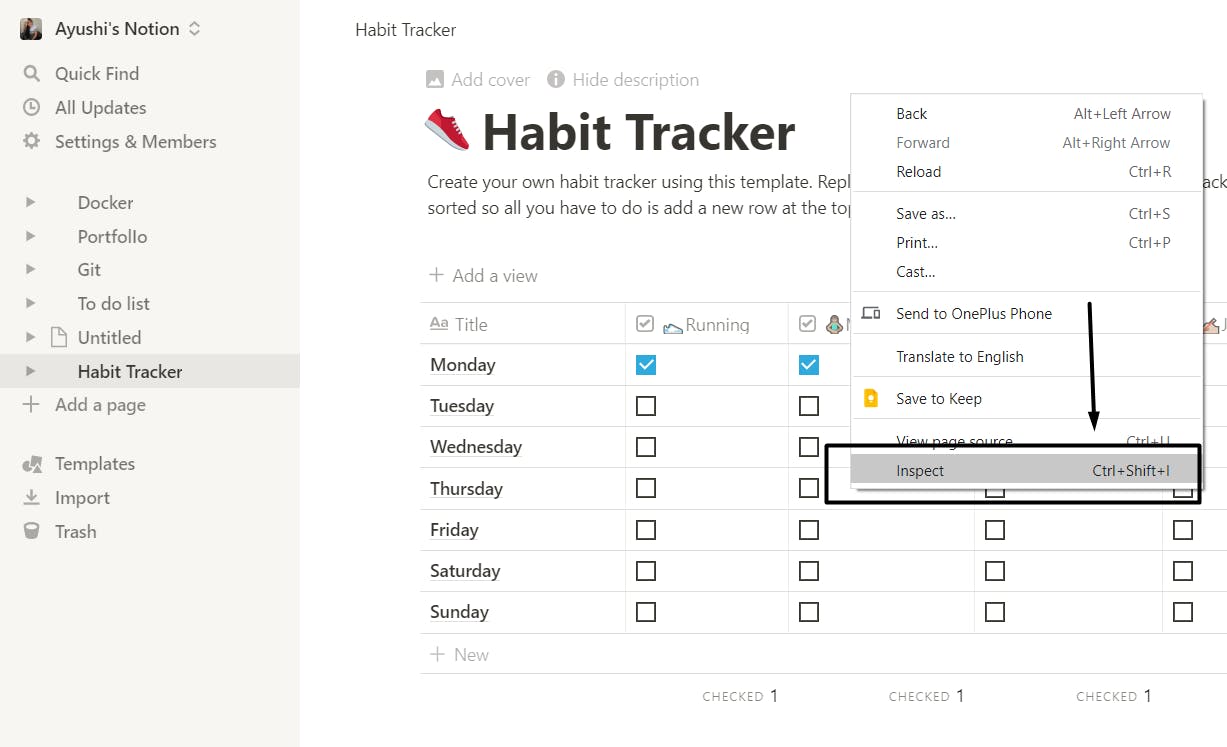
To open DevTools, hit Right click and select Inspect. You can also use the shortcut (Ctrl + Shift + I ) for Windows.
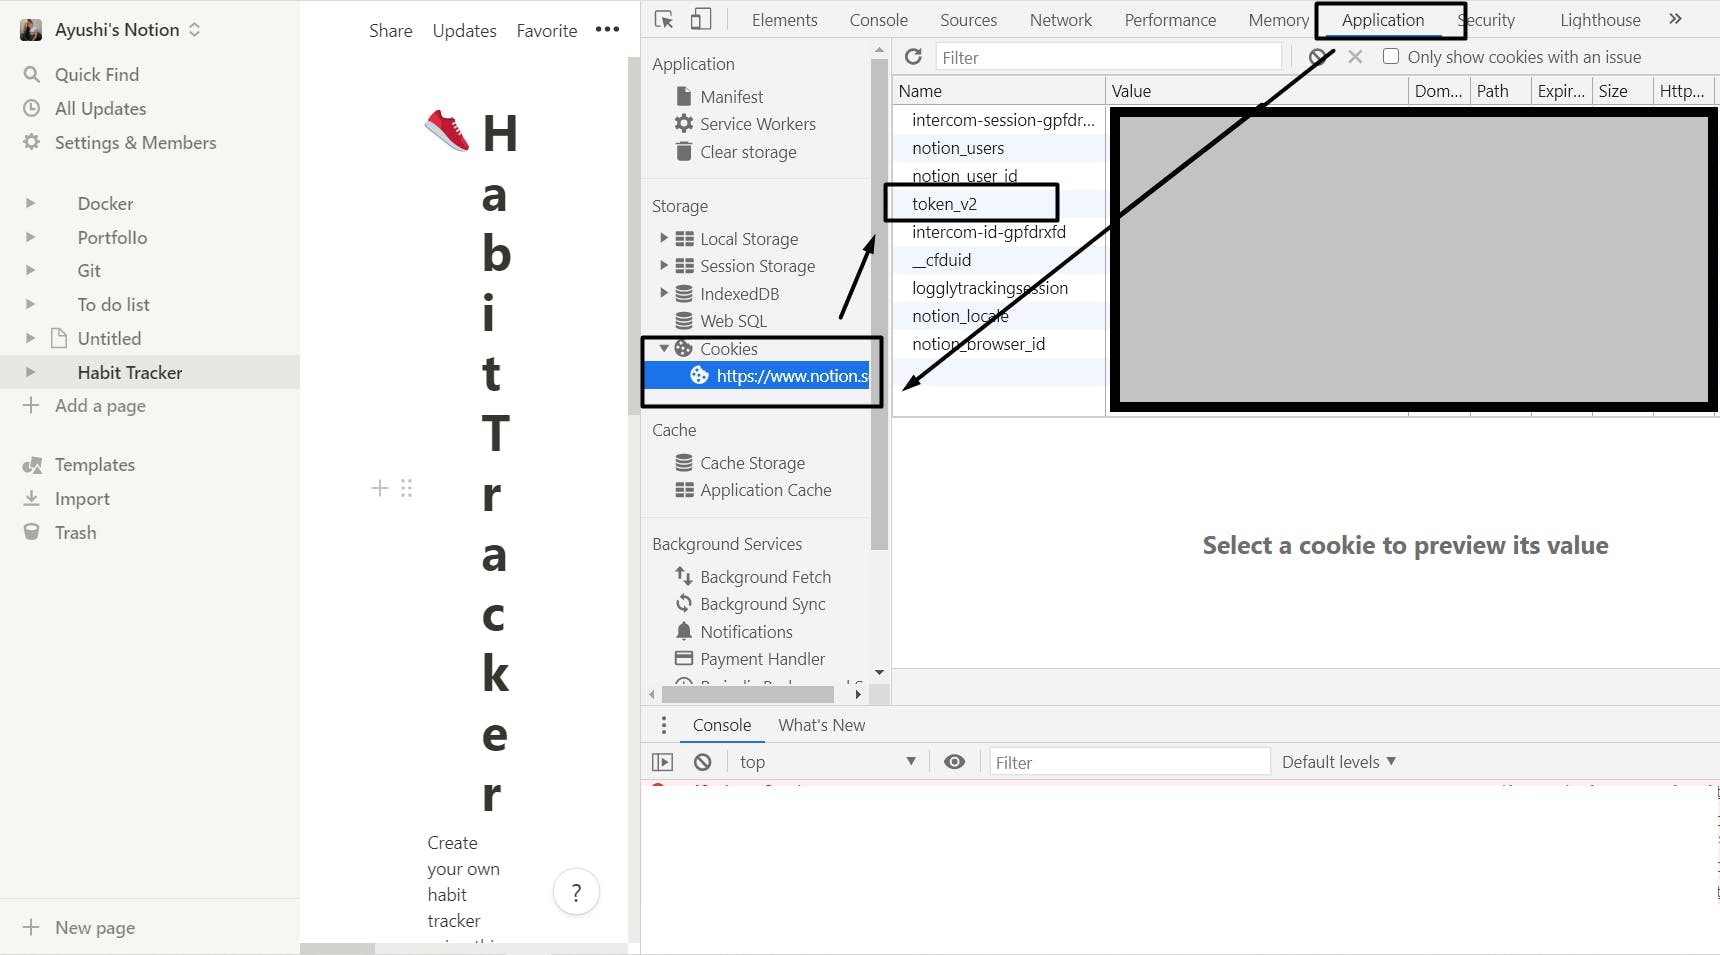 Next,
Next,
- navigate to Applications Tab
- Go to Storage section in the Left menu
- Expand Cookies
- Search for row with Name
token_v2 - Copy
token_v2's value and save it someplace safe.
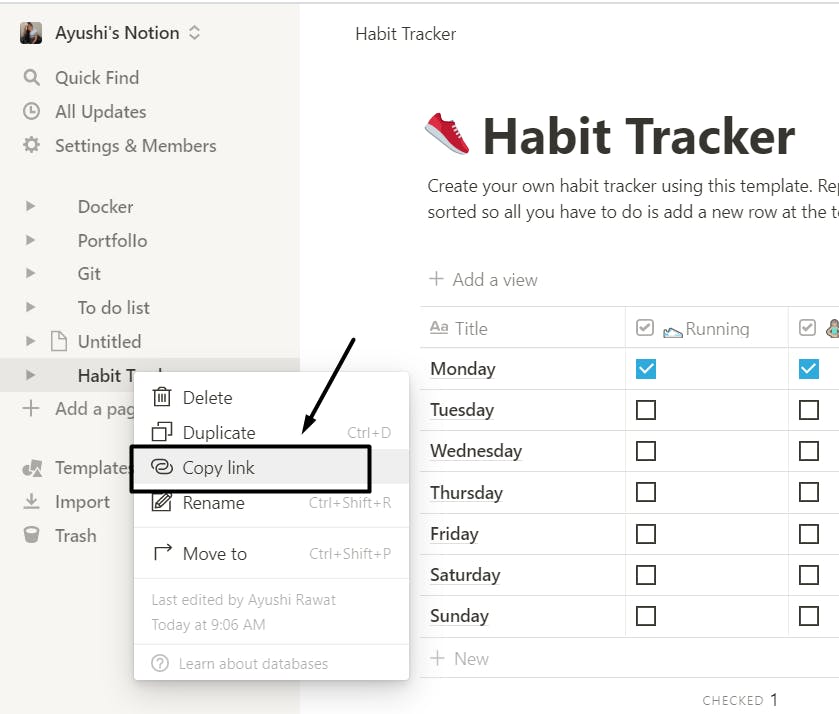
Close the DevTools window. Next, Copy the Tracker URL and store it with you for now.
token = 'your token goes here'

client = NotionClient(token_v2=token)
The value that you copied for token_v2 is reffered to as token here.
tracker_url = 'Your collection url goes here'

collection_view = client.get_collection_view(tracker_url)
The Habit Tracker’s URL is reffered to as Collection URL here.
Once we have setup the connection, let's add a new row. We will make use of add_row method here.
new_row = collection_view.collection.add_row()
Now let's populate values in the newly created row.
new_row.running = True
new_row.Journaling = True
new_row.screen_time_minutes = 30
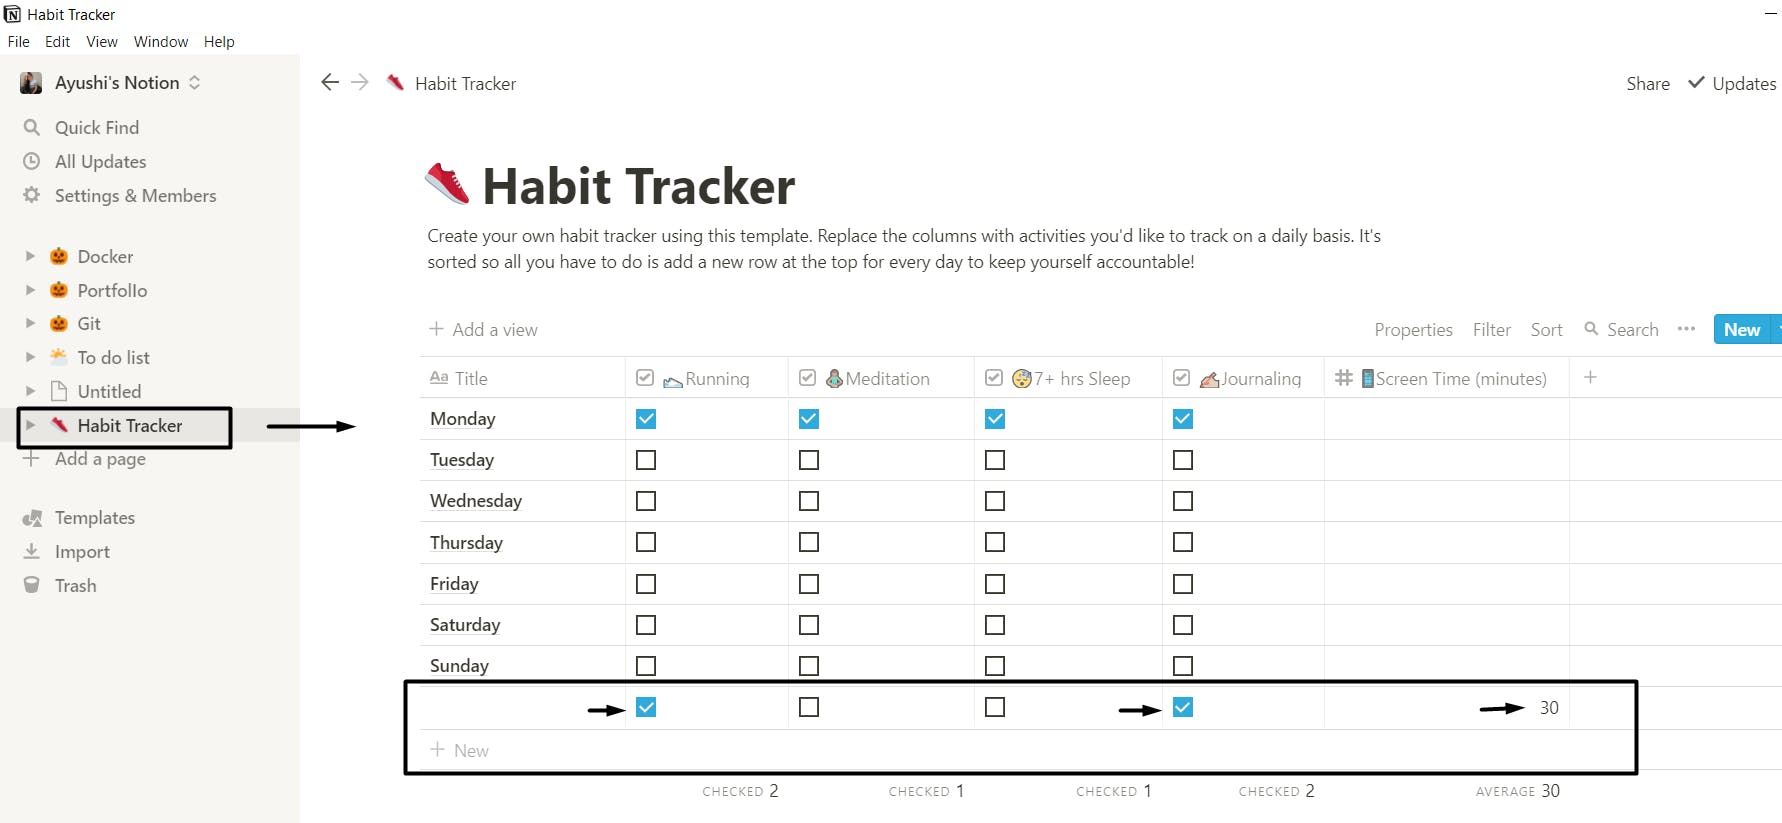
Save and Run the python script. You will observe a new row gets created and
- Running checkbox is enabled.
- Journaling checkbox is enabled.
- screen_time_minutes value is set to 30 mins
It will look something like this:
At last, let's automate our script by formatting the date of the new entry in Habit Tracker.
from datetime import datetime

today = datetime.today()
new_row.title = today.strftime('%d.%m.%Y')
With these steps, we have successfully Created an easy bot to automate a workflow in Notion using Python. That's it!
Simple, isn't it? Hope this tutorial has helped. I would strongly recommend you to Check out the YouTube video of the same and don't forget to subscribe my Channel.
You can play around with the Notion library and even explore more features. Tag me on Twitter when you do so.
You can find all the code at my GitHub Repository. Drop a star if you find it useful.
Thank you for reading, I would love to connect with you at Twitter | LinkedIn.
Do share your valuable suggestions, I appreciate your honest feedback!
You should definitely check out my other Blogs:
- Python 3.9: All You need to know
- The Ultimate Python Resource hub
- GitHub CLI 1.0: All you need to know
- Become a Better Programmer
- How to make your own Google Chrome Extension
- Create your own Audiobook from any pdf with Python
- You are Important & so is your Mental Health!
Resources:
- notion-py.readthedocs.io/en/latest/py-modin..
- pypi.org/project/notion
- github.com/jamalex/notion-py
- en.wikipedia.org/wiki/Notion_(app)
- notion.so
See you in my next Blog article, Take care!!